Shimpaku Juniper Bonsai: The Japanese Classic That Lives Up to the Hype
The Tree That Changed Everything for Me
In 2015, I went to my first big bonsai show in Washington, DC. I had been doing bonsai for about three years, just working with trees from local garden stores. I thought I knew what good bonsai looked like. Then I saw a 60 year old Shimpaku Juniper Bonsai.
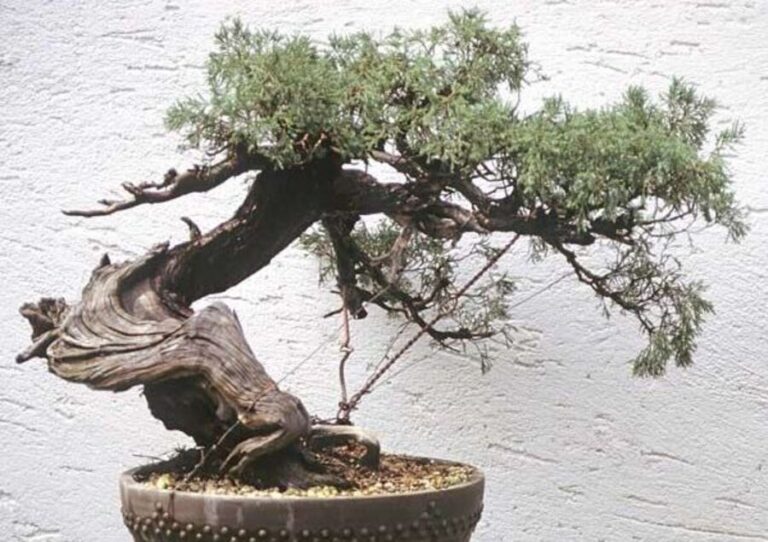
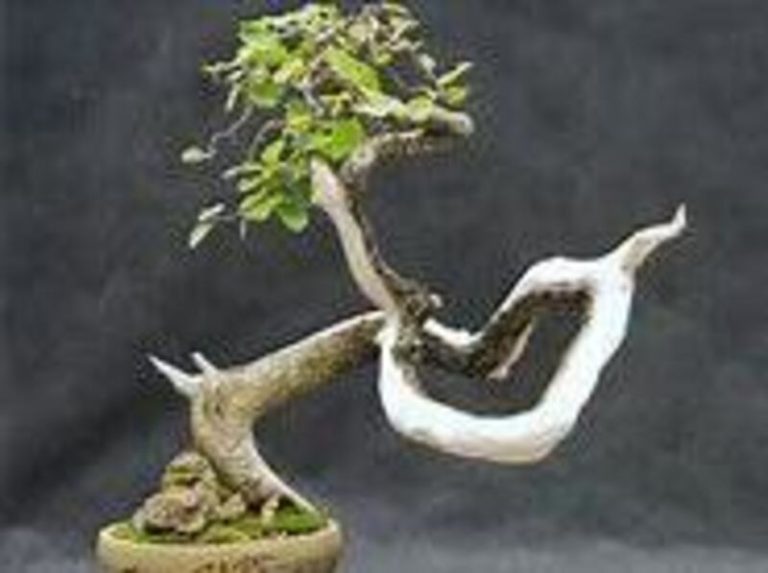
The trunk moved like frozen water. The dead wood was bright white, standing out beautifully against the reddish brown bark. The green leaves were so thick and perfect they looked like clouds. The tree was only 22 inches tall, but it looked like an ancient mountain giant.
I stood there for probably 20 minutes, just staring. That tree showed me what bonsai could really be.
Two months later, I bought my first Shimpaku plant from a bonsai shop in California. It was a small two year old plant in a pot. Nine years later, it has become one of my favorite trees, and I finally understand why Shimpaku Juniper is considered the best material for bonsai.
This is everything I wish someone had told me when I started.
What is a Shimpaku Juniper Bonsai?
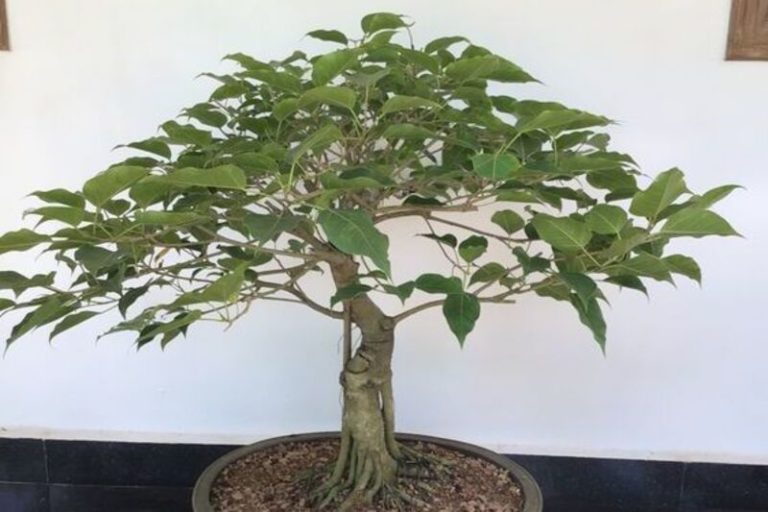
Shimpaku Juniper (Juniperus chinensis var. sargentii) is a type of Chinese Juniper that has been grown in Japan for hundreds of years just for bonsai. The name “Shimpaku” comes from the Japanese word for this special juniper plant. It grows naturally in the mountains of China and Japan.
What makes Shimpaku special is not just the plant itself, but centuries of careful selection. Japanese bonsai masters have been taking cuttings from the best trees for many generations. This has created plants that are perfect for bonsai. They have compact growth, fine leaves, flexible branches, and beautiful dead wood.
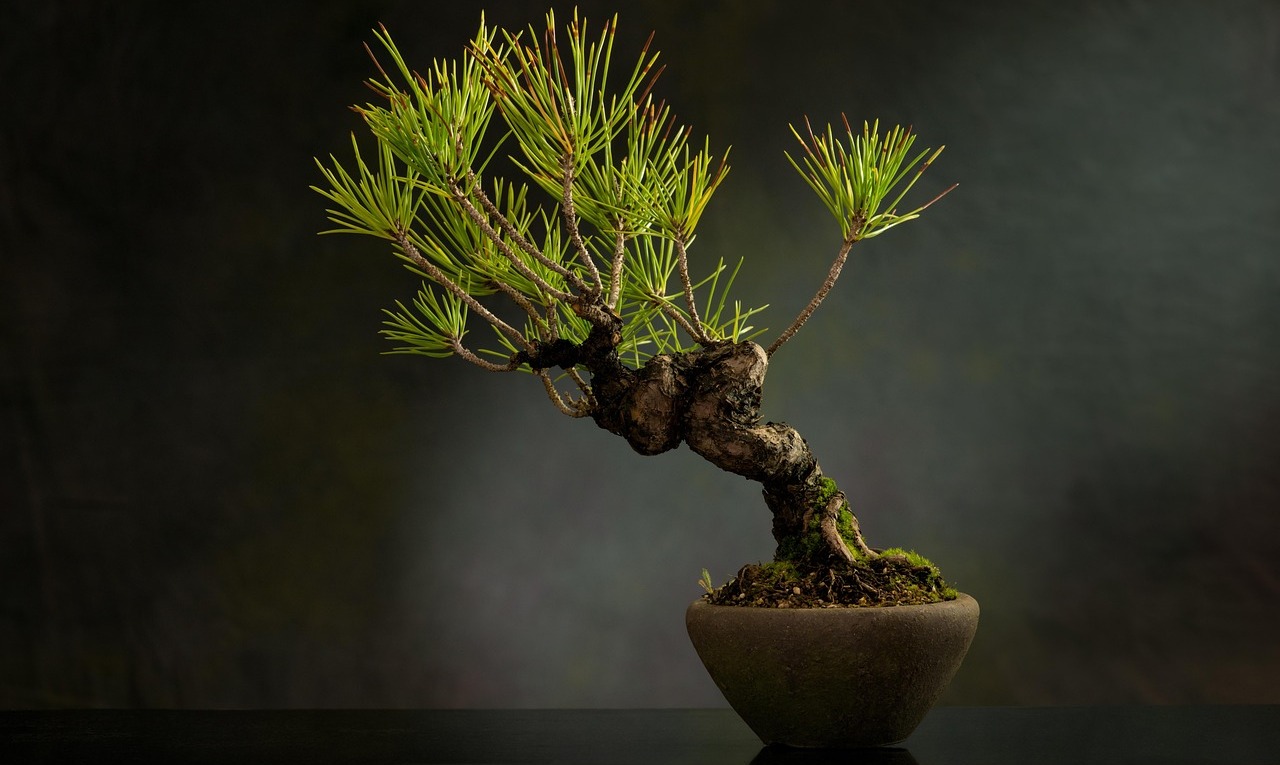
A Shimpaku Juniper bonsai is a tiny version of those ancient mountain junipers that grow on rocky cliffs. The leaves are scale like (adult leaves) rather than needle like (young leaves), forming thick, cloud like shapes. The wood is flexible when young, so you can bend it into dramatic shapes. The plant can develop beautiful dead wood features that make it look old and interesting.
In the bonsai world, if you say “juniper” without any other details, most people think you mean Shimpaku. It is that important to the art.
History and Cultural Significance
Shimpaku Juniper has been used in Japanese bonsai for at least 300 years, though bonsai itself is much older. During the Edo period (1603 to 1868), bonsai growing became more and more refined, and Shimpaku became one of the top choices.
Over those hundreds of years, masters kept selecting the best trees. They would take cuttings from trees that had great qualities like compact leaves, interesting bark, or good branches. Those cuttings became the next generation. After 300 years of this process, modern Shimpaku is almost a different plant from wild Chinese Juniper.
This plant became so connected with Japanese bonsai that when Americans and Europeans started getting serious about bonsai in the 1960s and 1970s, Shimpaku was one of the first plants they brought over. Many of the best Shimpaku in America today came from cuttings brought over during that time.
In Japanese bonsai art, Shimpaku represents several perfect qualities. It shows longevity (junipers can live for centuries), strength (they survive in harsh mountain conditions), and the balance between living and dead wood (representing the cycle of life and death). A well developed Shimpaku bonsai captures the essence of ancient mountain landscapes.
I learned much of this from talking to older members in my local bonsai club. One member had a Shimpaku grown from a cutting his teacher brought back from Japan in 1972. The tree was not special by Japanese standards, but knowing its history made it special.
What Makes Shimpaku Juniper Special for Bonsai
After nine years working with this plant (I have four trees now), here is what I have learned:
The Leaves are Amazing
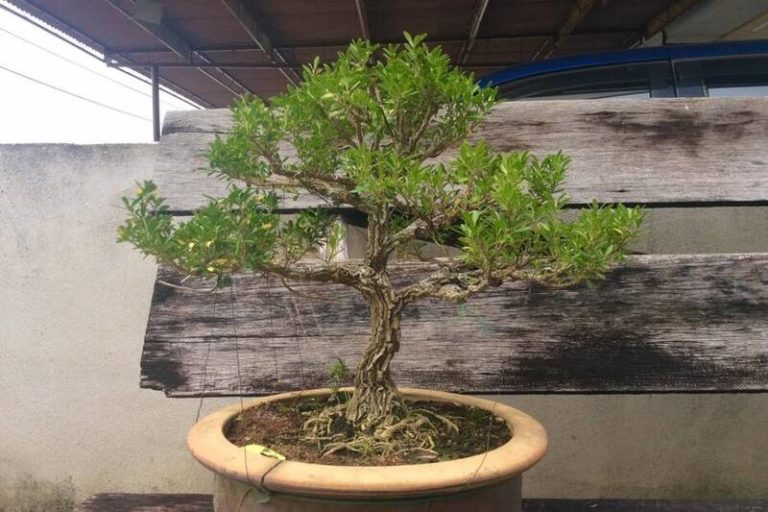
Shimpaku leaves are very thick and fine. The scale like leaves form tight masses that you can shape into precise, cloud like pads. The color ranges from bright green to blue green depending on how you grow it.
Unlike many junipers that produce scratchy, needle like young leaves, well maintained Shimpaku stays in adult leaf form. This is important because adult leaves look better and are easier to style into refined pads.
The thickness of the leaves also means you can create amazing empty space in your design. The contrast between thick green pads and open space (showing dead wood and branch structure) is what makes great Shimpaku bonsai so beautiful.
The Wood is Perfect for Bonsai
Shimpaku wood is flexible enough to wire and bend when the tree is young, but it hardens beautifully as it gets older. You can create dramatic trunk movement through wiring that becomes permanent over time.
The wood also works incredibly well for dead wood techniques. When you strip bark and create shari (dead wood on the trunk) or jin (dead wood branches), Shimpaku develops this beautiful bleached, weathered look that seems ancient. The wood grain spirals naturally, creating visual interest.
I have done dead wood carving on several types of trees, and nothing looks as good as Shimpaku. The wood is hard enough to hold detail but not so hard that it is difficult to work with.
They Actually Forgive Mistakes
Despite being called an “advanced” plant, Shimpaku is more forgiving than people think. It tolerates mistakes better than many plants. It bounces back from pruning errors. It survives less than perfect watering. It handles aggressive wiring. It recovers from repotting surprisingly well.
My first Shimpaku survived when I forgot to water it for three days in mid summer heat. The leaves turned brown slightly, but the tree recovered completely. Try that with an azalea or maple and you would have a dead tree.
Gets Better with Age
Shimpaku gets better as it gets older. A 5 year old tree looks like a project. A 15 year old tree starts looking impressive. A 30 year old tree can be spectacular. The bark develops character, the dead wood ages naturally, and the branches become incredibly fine.
This long term improvement means you are not working toward a finished tree. You are participating in an ongoing process of making it better. My 9 year old tree is better than it was last year, and it will be better next year than it is now.
Works for Many Styles
Shimpaku works for almost any bonsai style. Informal upright, slanting, cascade, semi cascade, literati, windswept, raft, even forest plantings. The plant is flexible enough to work with whatever vision you have.
This versatility means you can experiment and change direction as you learn. My main Shimpaku has been styled three different ways over nine years as my skills got better.
Types and Varieties of Shimpaku Juniper
Not all Shimpaku is the same. There are several types, each with slightly different features:
Classic Shimpaku (Juniperus chinensis var. sargentii)
This is the traditional form, what most people mean when they say “Shimpaku.” It has medium green leaves, good thickness, and all the classic features.
Features: Medium to dark green leaves, stays in adult leaf form, moderate to strong growth, excellent for all bonsai styles.
Best for: Traditional bonsai styling, both beginners and experts.
This is what I work with mostly. It is the standard for a reason.
Itoigawa Shimpaku
Named after the Itoigawa region of Japan, many people think this is the finest Shimpaku available. The leaves are extremely fine and thick, with a bright, almost lime green color.
Features: Very fine, bright green leaves, extremely thick growth, slightly slower growing than standard Shimpaku, stays in adult leaves very well, expensive.
Best for: Show quality bonsai, advanced practitioners, anyone wanting the absolute finest material.
I do not own an Itoigawa (they are expensive), but I worked on one at a workshop. The leaf thickness is noticeably better than standard Shimpaku. If you are serious about creating a show quality juniper, Itoigawa is worth the money.
Kishu Shimpaku
Another premium type from Japan, Kishu has slightly rougher leaves than Itoigawa but still finer than standard Shimpaku. The color is a nice blue green.
Features: Fine to medium leaves, blue green color, good strength, excellent balance between refinement and growth rate.
Best for: People wanting higher quality than standard Shimpaku without Itoigawa’s high price.
Shimpaku Torulosa (Hollywood Juniper)
This is technically a different variety but often grouped with Shimpaku in bonsai circles. It has twisted, irregular growth and naturally forms interesting dead wood.
Features: Naturally twisted growth, rougher leaves than true Shimpaku, more young leaves, strong growth.
Best for: Dramatic, naturalistic styles, cascade and semi cascade.
I have one Hollywood Juniper that I collected from a landscape five years ago. It is not as refined as my Shimpaku, but it has incredible natural movement.
For most people, standard Shimpaku is perfectly fine and much less expensive than premium types. As you gain experience, you might want to invest in Itoigawa or Kishu for special projects.
How to Grow a Shimpaku Juniper Bonsai
Let me walk you through what actually works, based on nine years of hands on experience.
Getting Starting Material
You have several options:
Option 1: Nursery Grown Bonsai Stock (My Recommendation for Beginners)
Many bonsai shops sell young Shimpaku plants made just for bonsai. These are usually 2 to 5 years old, already in training pots, and showing some basic styling.
Good things: Already has some trunk thickness, basic branch structure established, proven to be good bonsai material, reasonable price ($30 to $100).
This is how I started. My first Shimpaku cost $45 from a California shop. Nine years later, it is easily worth 10 times that (not that I would ever sell it).
Option 2: Rooted Cuttings
Some shops sell rooted cuttings. These are younger plants (1 to 3 years old) with minimal development. They are cheaper ($15 to $30) but need more years of development.
Good things: Low cost, maximum control over development, satisfaction of growing from near scratch.
Bad things: 5 to 10 years before it looks like a real bonsai.
Option 3: Landscape Nursery Stock
Regular garden centers sometimes carry juniper varieties that work for bonsai. Look for Juniperus chinensis varieties with good trunk movement and compact growth.
Good things: Very affordable, easy to find, can find interesting trunk shapes.
Bad things: May not be true Shimpaku, often has poor branch structure, may have a lot of young needle leaves.
I have successfully changed several landscape junipers to bonsai, but the results are never as good as starting with proper Shimpaku stock.
Option 4: Collected Material
Collecting wild juniper can give you amazing material, but it depends on the type and is often illegal. True Shimpaku does not grow wild in most places. If you are thinking about collecting, make absolutely sure it is legal.
Option 5: Yamadori or Imported Material
High end bonsai dealers sometimes offer collected Japanese or European mountain junipers or imported pre bonsai from Japan. These can be stunning but expensive ($500 to $5,000 or more).
This is for serious people with experience and money. Not where I would recommend starting.
Soil Mix That Works
Shimpaku needs excellent drainage. Root rot will kill these trees faster than almost anything else.
My mix for established trees: 50% akadama, 30% pumice, 20% lava rock
For trees still developing (growing for trunk thickness): 40% akadama, 30% pumice, 20% lava rock, 10% pine bark
The organic part (pine bark) encourages slightly stronger growth. For refined trees, I use almost entirely inorganic parts for maximum control.
Key rule: Water should drain through the pot in seconds, not minutes.
I learned this the hard way when a tree in 40% organic soil developed root rot. The soil stayed too wet, and fungus attacked the roots. Now I am strict about drainage.
Location and Climate Needs
Shimpaku Juniper is surprisingly adaptable to different climates, but there are some requirements:
Sunlight: Full sun is essential. Minimum 6 hours, but 8 or more hours is ideal. Not enough light causes weak growth, leaves that are too open, and return to young needle leaves.
Temperature: Shimpaku tolerates a wide range. They can handle cold down to about 10°F and summer heat up to 100°F if properly watered.
Winter Rest: Like most temperate plants, Shimpaku needs winter rest. Trying to keep them growing year round (like indoors) will eventually kill them.
Protection: In zones 5 and colder, provide some winter protection. I put mine on the ground against the house and mulch around the pots. In zones 6 to 9, they can usually stay on benches all winter.
My trees live outside year round in zone 7a. Summer temperatures reach 95 to 100°F, winter lows hit 10 to 15°F occasionally. The trees handle it all without problems.
Watering Strategy
This is where many people struggle with junipers. The common advice is “junipers like to be kept slightly moist,” which is vague and not very helpful.
Here is what actually works:
My approach: Water thoroughly when the soil surface is dry but slight moisture remains 1 inch down. For Shimpaku in proper bonsai soil, this usually means daily watering in summer, every 2 to 3 days in spring and fall, weekly or less in winter.
The key is understanding your specific conditions. Soil mix, pot size, climate, and sun exposure all affect watering frequency.
Signs you are watering correctly: Strong growth in growing season, thick leaves, bright green color.
Signs of under watering: Leaves turn slightly brown or bronze, tips feel dry and brittle, growth slows.
Signs of over watering: Yellowing leaves (especially older growth), weak, thin new growth, mushy roots, fungal smell from soil.
I killed my second juniper (not a Shimpaku, but still) by over watering in winter. The soil stayed cold and wet for weeks, roots rotted, tree died. Winter watering needs much more care than summer.
Fertilizing Schedule
Shimpaku responds well to regular fertilizing during the growing season.
My fertilizing program:
Spring (March to May): Balanced organic fertilizer (5 5 5 or similar) applied every 3 to 4 weeks
Summer (June to August): Continue balanced fertilizer, but reduce slightly during extreme heat
Fall (September to October): One final application of balanced fertilizer in early September
Winter (November to February): No fertilizer during winter rest
I use organic pellet fertilizer (Biogold or similar) because it releases slowly and consistently. I place pellets on the soil surface and let them break down naturally.
For trees still developing (growing for thickness), I fertilize slightly more heavily. For refined trees being maintained, I use less fertilizer to control strength.
Mistake I made: Over fertilizing a refined tree caused too much growth that destroyed the fine branches I had spent years developing. Now I am much more careful with fertilizer on my best trees.
Pruning and Leaf Management
This is where Shimpaku styling really happens. Proper pruning keeps thick leaf pads and encourages new growth.
Basic Pruning Technique:
Shimpaku grows in spurts throughout the growing season. New shoots extend outward from existing leaf pads. Your job is to keep these controlled while keeping thickness.
Pinching New Growth: When new shoots extend beyond the leaf pad shape, pinch them back. Do not cut with scissors (this damages the leaves and causes browning). Instead, pinch between your thumb and finger, pulling gently.
This keeps pad shape and encourages branching within the pad. I pinch my trees every 2 to 3 weeks during active growth.
Structural Pruning: Once or twice per year, I do more significant pruning to keep overall structure. This involves cutting back branches that have grown too long, removing crossing branches, and opening up the inside to allow light in.
Best timing for structural pruning: Early spring (before new growth) or fall (after growth slows).
Leaf Cleaning: Shimpaku naturally sheds inside leaves as outer leaves shade them. This dead brown leaf material needs to be removed regularly (every few months) to prevent pest problems and improve air flow.
I use tweezers to pull out dead leaves from the inside of pads. It is boring but necessary.
Wiring Techniques
Shimpaku wires beautifully. The branches are flexible enough to shape dramatically but strong enough to hold their position.
Wiring Guidelines:
Best timing: Shimpaku can be wired almost any time of year, but I prefer late fall to early spring when growth is slow. The branches are slightly more stiff when resting, which actually makes them easier to position.
Wire type: I use aluminum wire for most work. It is easier on the bark than copper and good enough for Shimpaku’s relatively soft wood.
Technique: Wire from trunk to branch tips, working systematically. Apply wire at a 45 degree angle, spacing coils evenly. Use right wire thickness (should need some effort to bend the branch, but not too much force).
Duration: Check wire every 2 to 3 months. Shimpaku bark is relatively soft and will scar if wire is left too long. I usually remove wire after 6 to 12 months.
I made the mistake of leaving wire on my first tree for over a year. It cut into the bark in several places, creating permanent scars. Those marks are still visible five years later. Now I check wire regularly.
Repotting Needs
Shimpaku develops thick root systems relatively quickly, especially in the first years of development.
Repotting Schedule:
Young trees (under 10 years): Every 2 years
Mature trees (10 to 25 years): Every 3 to 4 years
Old, refined trees: Every 4 to 5 years
Best timing: Early spring, just before new growth begins. In my climate (zone 7a), this is usually late March to early April. The buds will be swelling but not yet opening.
Repotting Process:
Remove tree from pot carefully. Use a root hook to gently comb out the outer 30 to 40% of the root mass. Trim circling roots and prune 20 to 30% of total root mass. Remove old soil from bottom and sides, but leave soil around the trunk base (helps tree survive the stress). Put in new or same pot with fresh soil. Water thoroughly. Protect from wind and extreme temperatures for 2 to 3 weeks while roots establish.
Mistakes I have made: Repotting too aggressively (removed 50% or more of roots), tree struggled for two years. Repotting in fall (late September), tree struggled through winter and showed weak growth the next spring.
Lesson learned: Careful root pruning and proper timing matter a lot.
Benefits of Growing Shimpaku Juniper Bonsai
After nine years with this plant, here is what I truly value:
The Gold Standard of Bonsai Material
Working with Shimpaku teaches you proper bonsai technique because the plant responds so well to correct methods and shows problems clearly when you make mistakes. It is like learning to cook with quality ingredients versus cheap ones.
Many of the best bonsai in the world are Shimpaku. If you want to understand what makes great bonsai great, study Shimpaku.
Amazing Longevity
Shimpaku bonsai can live for centuries with proper care. The tree you start today could be passed down to your grandchildren. There is something meaningful about working on a living artwork that outlasts you.
My best tree is only 11 years old total (9 years with me), but I think about where it might be in 30 or 50 years. That long view changes how you approach the work.
Refinement Potential
The leaf thickness, branch flexibility, and dead wood capabilities mean you can create incredibly refined bonsai with Shimpaku. The ceiling for quality is very, very high.
Even my relatively young trees show a level of refinement that would be impossible with many other plants.
Year Round Interest
Unlike trees that drop their leaves, Shimpaku looks good 12 months a year. The evergreen leaves provide constant visual interest, and the dead wood creates dramatic contrast year round.
In winter, when my other trees are bare, the Shimpaku are still beautiful.
Rewarding to Work With
There is a satisfaction in pinching leaves, seeing new buds appear exactly where you want them, and watching the tree slowly transform year after year. Shimpaku responds to good care, and that response is rewarding.
Moderate Difficulty Level
Shimpaku is often called an “intermediate to advanced” plant, but honestly, it is more forgiving than that reputation suggests. If you can keep an outdoor plant alive and watered, you can grow Shimpaku successfully.
The “advanced” label comes more from the styling techniques needed to create refined bonsai, not from basic care difficulty.
Styling and Design Philosophy
The best Shimpaku bonsai I have seen share certain design rules:
Balance Between Living and Dead Wood
Great Shimpaku bonsai use dead wood (shari and jin) to create contrast and suggest age. The bleached white dead wood against dark reddish brown living bark and green leaves creates incredible visual interest.
But the balance matters. Too much dead wood and the tree looks dead. Too little and you are not using one of Shimpaku’s best features.
My rule: Living tissue should dominate (60 to 70%), with dead wood providing accent and drama (30 to 40%).
Thick Leaf Pads with Clear Empty Space
The leaves should be thick and refined, shaped into distinct pads or clouds. But equally important is the empty space between pads, which allows the viewer to see the trunk, branch structure, and dead wood.
I struggled with this idea for years. I kept trying to cover every branch with leaves. Finally, a more experienced person told me: “The spaces are as important as the leaves.” That changed everything.
Now I consciously create and keep open space in my designs.
Movement and Flow
The trunk should have movement, not be stiffly straight (unless you are specifically creating a formal upright, which is rare with Shimpaku). This movement should feel natural, like wind or terrain shaped the tree over years.
The branches should flow with the trunk’s movement, creating a sense of unity and rhythm.
Natural Rather Than Geometric
Shimpaku should look like ancient mountain trees, not shaped bushes. Avoid overly symmetrical designs or perfectly round leaf pads. Asymmetry and irregularity look more natural and interesting.
Think About Display
In Japanese bonsai tradition, how you display the tree matters as much as the tree itself. Think about the pot (usually unglazed, earthy tones for Shimpaku), the accent plant, the stand, and the overall presentation.
I display my best Shimpaku in an unglazed oval pot in a warm brown tone. The pot complements rather than competes with the tree.
Seasonal Care Guide
Spring (March to May)
Spring is the busy season. Trees wake up, growth speeds up, and major work happens.
Tasks: Repot if scheduled (before buds open). Begin regular fertilizing when buds swell. Watch for pests (spider mites appear in warm weather). Start regular pinching of new growth. Do any major structural pruning before growth starts.
What to expect: New growth appears as light green shoots extending from leaf pads. Growth is strong and needs regular pinching to keep pad shape.
Summer (June to August)
Active growth continues, though it may slow slightly in extreme heat.
Tasks: Continue regular pinching (every 2 to 3 weeks). Keep consistent watering (often daily in hot weather). Continue fertilizing but reduce slightly during extreme heat. Watch for spider mites (they love hot, dry conditions). Wire new growth if needed.
What to expect: Leaf pads fill in and become thicker. The tree gains strength.
Fall (September to November)
Growth slows as temperatures drop. This is preparation for winter rest.
Tasks: Continue pinching as needed (less frequent as growth slows). Final fertilizing in early September. Structural pruning if needed (after growth stops). Check and remove cutting wire. Clean dead leaves from inside.
What to expect: Growth slows a lot by October. Leaves may darken slightly or take on bronze tones in cold weather (this is normal).
Winter (December to February)
Trees are resting. Minimal work needed.
Tasks: Minimal watering (weekly or less, only enough to prevent complete drying). Protect from extreme cold if needed (below 10°F). Check for winter damage after storms or extreme weather. Major wiring can be done now (branches are slightly stiffer when resting). Plan next year’s development.
What to expect: No active growth. Leaves may bronze slightly in extreme cold (normal and healthy). Tree looks resting but is alive.
Common Problems and Solutions
Bronze or Brown Leaves
Causes: Under watering, winter cold (normal), spider mites, or root problems
Solution: If it happens in winter, it is probably normal cold response and will green up in spring. If it happens in summer, check for spider mites (tiny webs, spotted leaves) and increase watering. If throughout the tree, check roots for rot.
Return to Young Needle Leaves
Causes: Not enough light, over pruning, or tree stress
Solution: Increase sunlight exposure. Avoid cutting back to bare wood (this often triggers young needle leaves). Remove young growth when you see it (it looks needle like and spiky versus scale like adult leaves).
My first tree kept producing young needle leaves until I moved it to a sunnier location. Problem solved.
Sparse, Open Leaves
Causes: Not enough light, under fertilizing, or not enough pinching
Solution: Increase sun exposure. Make sure you fertilize regularly during growing season. Pinch new growth more frequently to encourage branching within leaf pads.
Branch Die Back
Causes: Not enough light to inside branches, too much shading from upper leaves, or branch too weak
Solution: Thin upper leaves to let more light reach lower branches. Keep strength in lower branches through careful fertilizing and allowing some growth. If a branch is dying, remove it completely rather than leaving a stub.
Spider Mites
Causes: Hot, dry conditions with not enough air flow
Solution: Spray with water forcefully to knock off mites. Use horticultural oil or insecticidal soap. Improve air flow around tree. In severe cases, use miticide.
I battle spider mites every summer. Weekly water spray on the leaf underside helps a lot as prevention.
Wire Scars
Causes: Leaving wire on too long (Shimpaku grows faster than you think)
Solution: Check wire every 2 to 3 months. Remove before it cuts. If scars happen, they will eventually heal but may take 5 to 10 years. Use raffia or tape under wire in important areas to prevent scarring.
Shimpaku Juniper Bonsai Care Sheet
| Aspect | Care Guidelines |
|---|---|
| Light | Full sun, minimum 6 hours daily. 8 or more hours ideal for best leaf thickness. |
| Water | When soil surface dry but moisture remains 1 inch down. Daily in summer, weekly in winter. |
| Soil | Well draining: 50% akadama, 30% pumice, 20% lava rock. Excellent drainage critical. |
| Fertilizer | Balanced organic fertilizer spring through summer, applied every 3 to 4 weeks. None in winter. |
| Temperature | Can handle cold to 10°F. Tolerates heat to 100°F or more with proper watering. |
| Humidity | Tolerates wide range. Prefers moderate humidity but adapts well. |
| Repotting | Every 2 years (young trees), 3 to 4 years (mature). Early spring before new growth. |
| Pruning | Pinch new growth every 2 to 3 weeks during growing season. Structural pruning early spring or fall. |
| Wiring | Can wire year round, but fall to spring is ideal. Check every 2 to 3 months. Remove after 6 to 12 months. |
| Pests | Spider mites in hot, dry weather. Scale insects occasionally. Generally pest resistant. |
| Winter Care | Hardy but provide protection in zones 5 and colder. Reduce watering a lot. |
Who Should (and Should Not) Grow Shimpaku Juniper
After nine years with this plant, here is my honest assessment:
Shimpaku Juniper is Great For:
Anyone serious about learning proper bonsai technique. People in zones 5 to 9 with outdoor growing space. People who appreciate refinement and are willing to work for it. Those interested in traditional Japanese bonsai looks. Intermediate practitioners ready to move beyond beginner plants. Anyone wanting a long term bonsai project that improves with age.
Shimpaku Juniper is NOT Great For:
Indoor bonsai lovers (must be grown outdoors). Tropical climate growers (zones 10 to 11, they need winter rest). Complete beginners (start with something easier, then move to Shimpaku). People wanting instant results (refinement takes years). People without outdoor space and full sun.
The Bottom Line
If you have outdoor growing space, live in a suitable climate (zones 5 to 9), want to learn traditional bonsai technique, and are willing to invest years in development, Shimpaku Juniper might be the perfect plant for you.
It was for me. That small $45 plant from 2015 has taught me more about bonsai than any other tree. It responds to good care, shows mistakes clearly, and improves steadily year after year.
Nine years in, I am still learning from it. That is the beauty of working with quality material.
Resources and Further Learning
Books: “The Japanese Way of the Artist” by H.F. Davey (includes bonsai philosophy). “Bonsai Techniques I and II” by John Naka (classic instruction, many Shimpaku examples). “The Art of Bonsai Design” by Colin Lewis (includes Shimpaku styling).
Online Resources: Bonsai Mirai (Ryan Neil’s content includes excellent juniper work). Bonsai Empire (complete care guides and video tutorials). Bonsai Nut forums (search “Shimpaku” for extensive discussions).
People to Follow: Ryan Neil (Bonsai Mirai), though he often works with native American junipers, techniques translate directly. Bjorn Bjorholm (his online content includes excellent juniper instruction). Mauro Stemberger (Italian master with spectacular Shimpaku).
Where to See Examples: National Bonsai and Penjing Museum (Washington, DC) has world class Shimpaku. Pacific Bonsai Museum (Seattle, WA) includes excellent junipers. Kokufu ten exhibition catalog (annual, shows Japan’s best bonsai, many Shimpaku).
Final Thoughts
That 60 year old Shimpaku I saw in 2015 changed how I understood bonsai. It showed me that with the right plant, proper technique, and enough time, you can create something truly amazing.
My own trees are nowhere near that level yet. My best Shimpaku is 11 years old total, still very much developing. But I can see the potential. I can imagine where it might be in 20 or 30 years if I keep working, keep learning, and keep improving.
That is what makes Shimpaku special. It is not just a plant. It is a decades long conversation between you and a living tree. You shape it, and it teaches you. You impose your vision, and it shows you its own character. Over years, something emerges that is neither purely your creation nor purely the tree’s nature, but a team effort.
If you are thinking about Shimpaku Juniper, my advice is simple. Start with good material, learn proper technique, be patient, and enjoy the process. The results will not come quickly, but they will come.
And maybe 20 years from now, someone will see your tree at a show and think, “This is what bonsai can be.” That is worth working toward.
Frequently Asked Questions
Q: Where can I buy Shimpaku Juniper for bonsai?
A: You can buy Shimpaku from specialized bonsai nurseries (online or local), bonsai clubs that have member sales, online retailers like Brussel’s Bonsai or Eastern Leaf, or bonsai shows and exhibitions. Expect to pay $30 to $100 for young starter material, more for developed trees.
Q: Can I grow Shimpaku Juniper bonsai indoors?
A: No. Shimpaku Juniper must be grown outdoors. They need full sun, fresh air, and winter dormancy to survive. Keeping them indoors will eventually kill them, usually within 6 to 12 months. There are no exceptions to this rule.
Q: How long does it take to develop a Shimpaku Juniper bonsai?
A: From young nursery stock, expect 7 to 10 years for a decent looking bonsai. A truly refined, show quality tree takes 15 to 30 years or more. Collected material from mountains can look impressive faster but still needs years of refinement.
Q: What is the difference between Shimpaku and other junipers for bonsai?
A: Shimpaku is specifically bred for bonsai over centuries. It has finer foliage, better adult leaf retention, more compact growth, and superior dead wood characteristics compared to most other junipers. It is considered the best juniper for traditional bonsai.
Q: When should I prune my Shimpaku Juniper?
A: Pinch new growth every 2 to 3 weeks during the growing season (spring to fall) to maintain shape. Do major structural pruning in early spring before new growth starts or in fall after growth slows. Never cut back to completely bare wood as this may kill the branch.
Q: How often should I water my Shimpaku Juniper bonsai?
A: Water when the soil surface is dry but moisture remains about 1 inch down. In summer, this usually means daily. In spring and fall, every 2 to 3 days. In winter, weekly or less. Always check the soil rather than watering on a fixed schedule.
Q: Are Shimpaku Juniper good for beginners?
A: They are better suited for intermediate level practitioners who have kept at least one other outdoor bonsai alive for a full year. They are not as difficult as their reputation suggests, but they do require outdoor space, proper watering discipline, and patience.
Q: What size pot should I use for Shimpaku Juniper bonsai?
A: The pot should be approximately two thirds the height of the tree for upright styles, or two thirds the width for cascade styles. Depth should accommodate the root system with room for growth. Use unglazed, earth toned pots for best appearance with Shimpaku.
Q: Do Shimpaku Juniper need special winter care?
A: In zones 6 to 9, they can stay on benches outdoors all winter with no special care. In zones 5 and colder, place pots on the ground, against a building, or in a cold frame for root protection. They need cold temperatures for dormancy but protect roots from sustained hard freezes below 10°F.
Q: Why is my Shimpaku producing needle like foliage instead of scale like adult foliage?
A: This is called juvenile foliage and is usually caused by insufficient light, stress, or cutting back to bare wood. Move the tree to a sunnier location, reduce stress factors, and remove juvenile growth when you see it. With proper care, the tree will return to adult foliage.
Q: How do I create dead wood (jin and shari) on Shimpaku Juniper?
A: Use a sharp knife or jin pliers to carefully strip bark from branches (jin) or trunk (shari). Only do this on mature, healthy trees. After creating dead wood, apply lime sulfur to bleach and preserve it. This is an advanced technique better learned through workshops or hands on instruction.
Q: Can I grow Shimpaku Juniper from seed?
A: Technically yes, but it is not recommended. Seeds take 15 to 20 years to develop into anything resembling a bonsai. Also, seed grown plants may not have the refined characteristics of cutting grown Shimpaku. It is much better to buy rooted cuttings or young nursery plants.
Q: What are the most common mistakes people make with Shimpaku Juniper?
A: The biggest mistakes are trying to grow them indoors (they die), overwatering in winter (root rot), leaving wire on too long (permanent scars), cutting back to bare wood (branches die), and not providing enough sunlight (weak growth and juvenile foliage).
Q: Is Itoigawa Shimpaku worth the extra cost?
A: If you are serious about creating show quality bonsai and have the skills to maintain it, yes. The foliage quality is noticeably superior. For learning and general enjoyment, standard Shimpaku works perfectly well and costs much less.
Q: How do I know if my Shimpaku Juniper is healthy?
A: A healthy Shimpaku has bright green foliage (not yellowing or browning), strong new growth in spring and summer, dense foliage pads, flexible branches, and white healthy roots (check during repotting). The tree should respond quickly to pinching with new back budding.
Also Read: